PRZIO platform
PRZIO — Host free. Convert faster.
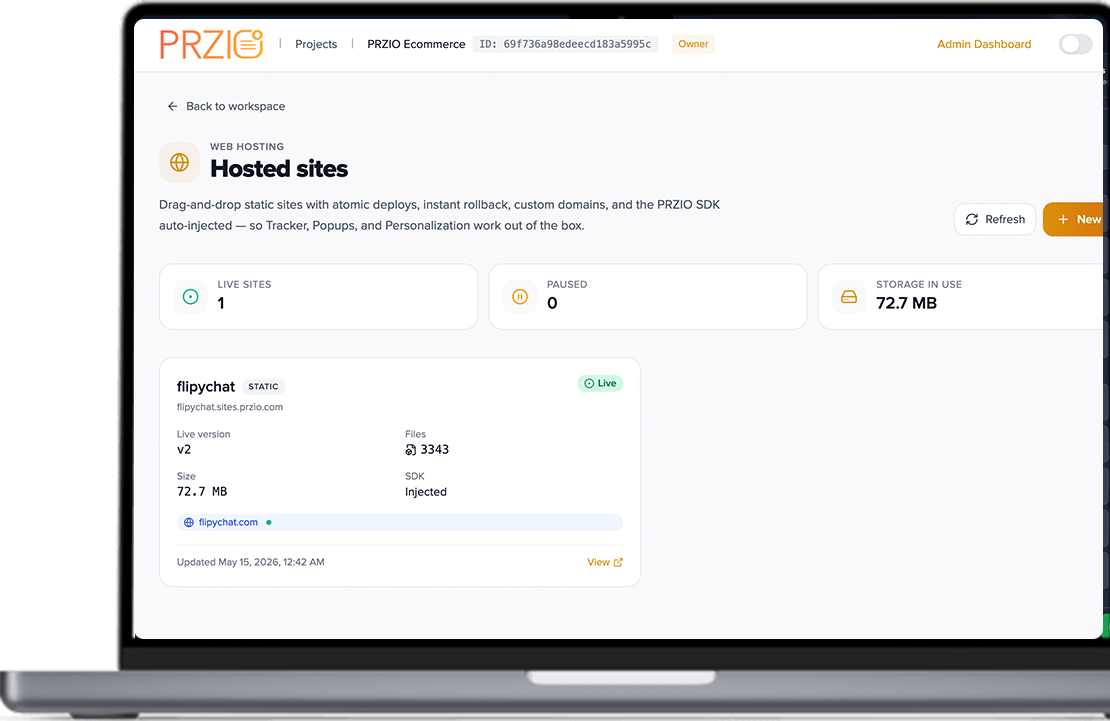
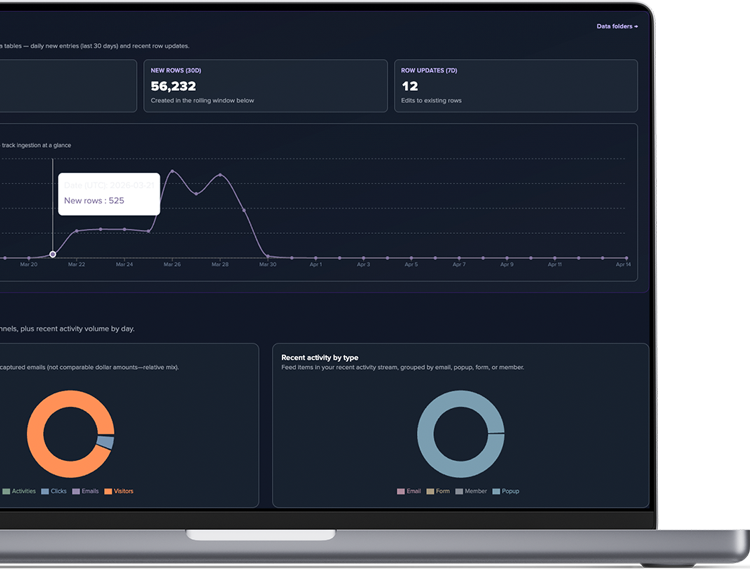
PRZIO gives you free hosting for static sites & WordPress—plus popups, forms, email, and personalization in one dark, focused workspace.
- Drag-drop deploys with one-click rollback
- Custom domains & auto HTTPS
- WordPress on SQLite in one click
- Marketing SDK auto-injected on every page