About the tool
A personalization activity is a saved bundle of rules and experiences that the PRZIO script can apply when someone loads your site.
Website personalization in PRZIO starts with a personalization activity tied to a target URL—the page you load inside the visual editor. You click elements on the real page and change text, HTML, CSS, attributes, visibility, or add insertions. For advanced cases, you can attach custom code (CSS, JavaScript, HTML) when you need behavior the point-and-click editor does not cover.
Delivery is always a partnership between two layers: where the activity runs (URL conditions—similar to popups) and who should see it (optional audience conditions). When both layers match a visitor’s session, the configured experiences (variants) are evaluated—either a single experience for everyone who qualifies, or a split when you run an A/B test.
Why this model works for teams
Marketers get in-context editing; developers keep the core app stable because changes are data-driven and reversible. Product and growth can try messaging and layout ideas on production traffic with guardrails instead of waiting for release cycles.
How it works
From blank activity to live experiences—at a glance.
-
Create and scope an activity. Give it a clear name, set the site URL to load in the editor, and define URL conditions so the activity only runs on the right pages (for example path contains
/pricing, equals a landing URL, or “landing page” rules depending on your setup).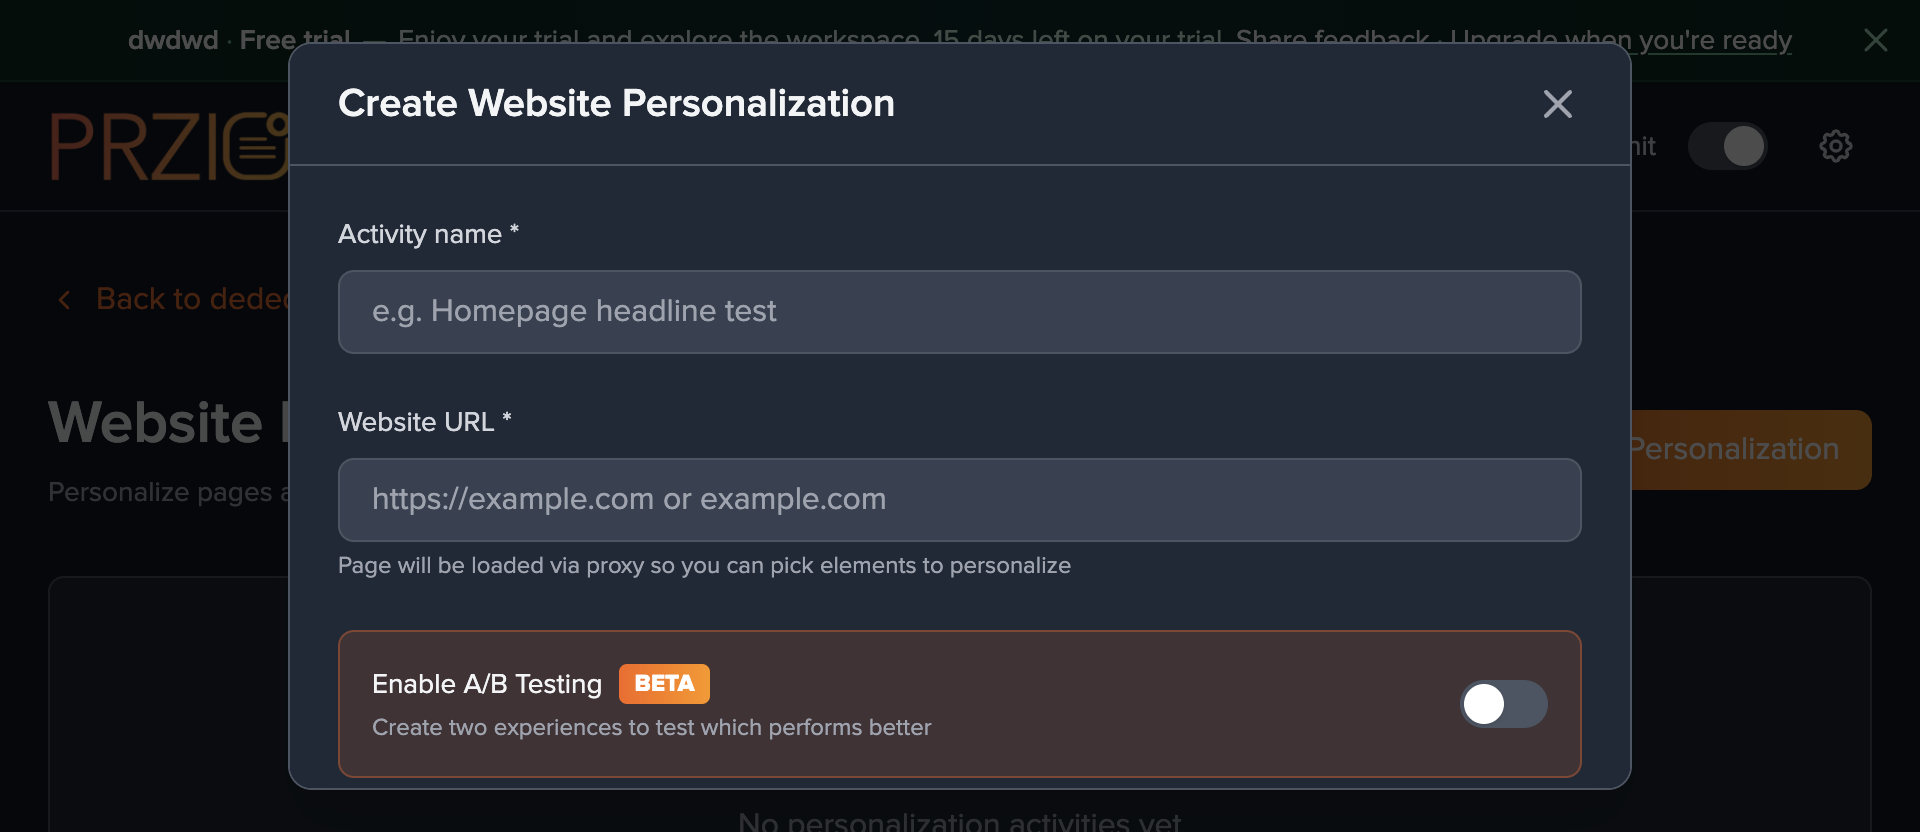
Step 1 — Create and scope: name, target URL, and page conditions (cropped modal; no account header). -
Design in context. Use the visual editor to select nodes and apply text, HTML, attribute, show/hide, or CSS changes. Add insertions before or after selectors when you need new blocks of content. Tag important elements with click metrics so you can compare engagement between variants.

Step 2 — Design in context: live page preview and Inspect panel (localhost capture). -
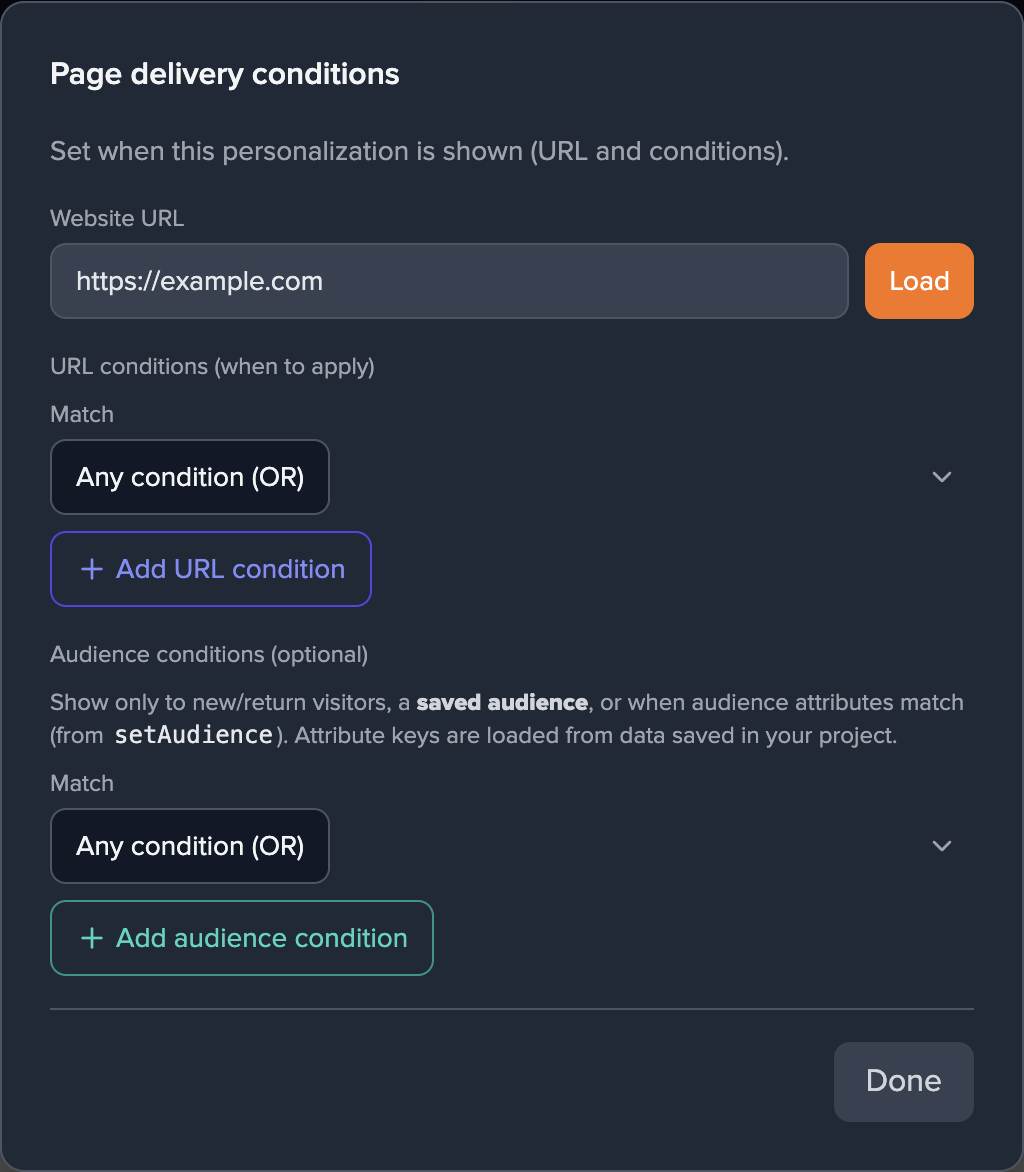
Optional: narrow who sees it. Open delivery settings and add audience conditions (see the next sections). Choose whether any condition or all conditions must match—so you can express both broad segments and precise combinations.

Step 3 — Optional audiences: URL rules and audience rules in one modal (cropped). -
Activate and learn. Move the activity out of draft, ensure your project’s embed/snippet is on the site, and watch views and click metrics. For A/B tests, set traffic splits, run until you have signal, then declare a winner when you are ready to standardize on one experience.
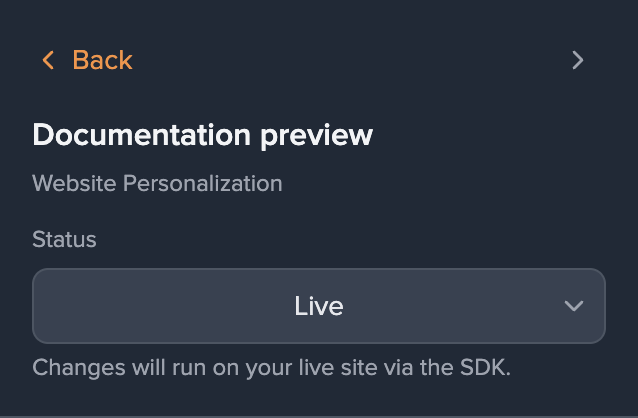
Step 4 — Activate: set status to Live when you are ready (sidebar crop).
Everything is stored under your project in PRZIO. That keeps experiments organized, lets you reuse audiences across activities where it makes sense, and separates staging ideas from what is actually activated.
Click metrics on an activity
Name the outcomes you care about—PRZIO records clicks on those elements per experience.
Click metrics are optional labels you attach to specific elements in the visual editor so you can measure engagement on the buttons, links, and cards that matter. Each metric stores a display name (what you see in reporting) and a CSS selector pointing at the DOM node to listen for clicks—usually the element you selected when you created the metric.
Metrics belong to an experience, not only to the activity as a whole. If you run an A/B test, Experience A and Experience B each maintain their own list of click metrics. That way you can track the same primary CTA in both variants (often with the same human-readable name) and compare counts side by side, even when the underlying HTML or layout differs between variants.
Views vs. clicks
When a visitor qualifies for an experience and your personalization is applied, views of that experience are recorded automatically—you do not add a separate “view metric.” Click metrics are only for intentional interactions: taps or clicks on the elements you explicitly tag. Use both in the metrics view: reach (who saw the experience) and action (who clicked tracked elements).
How to add a click metric
-
Select an element in the editor. Use the same selection flow as for text or style edits—typically via the page context menu on the node you want to measure (for example a “Get started” button or a pricing tier card).
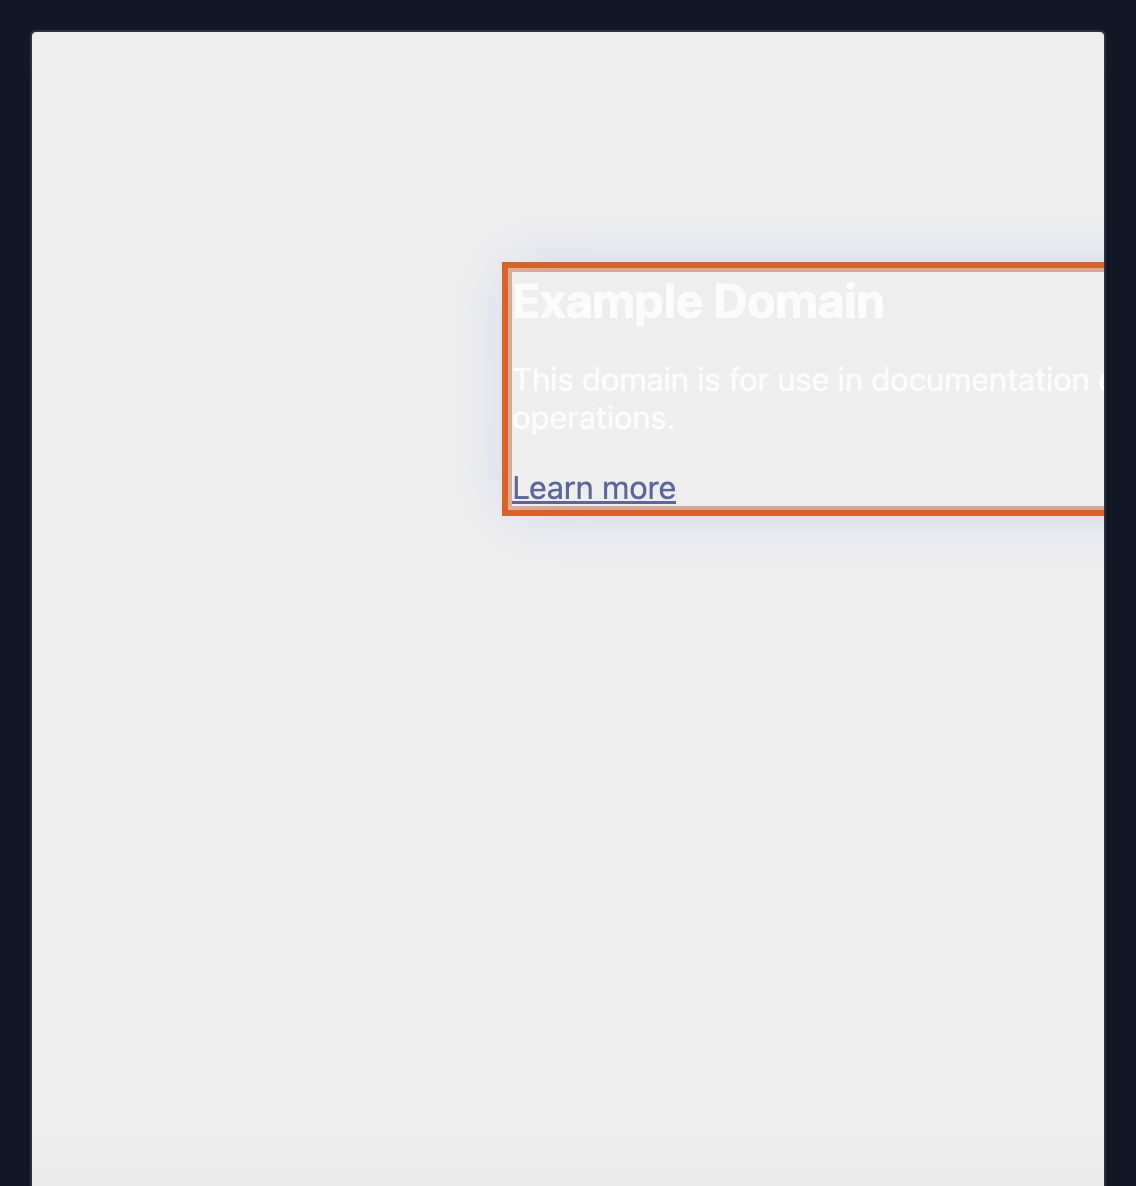
Select the element in the preview; outline shows the current selection (no workspace chrome). -
Add a click metric. Choose the action that registers a tracked click for the current experience. You will be prompted for a metric name—pick something stable and readable (for example
Primary CTA,Pricing — Business tier, orHeader — Login). If you leave the name blank, a default label may be used; naming metrics clearly keeps dashboards interpretable when you have many rows.
Name the metric (wireframe: dialog opens from the page context menu after you right‑click an element in the preview). -
Save the activity. The metric is stored on the active experience with a unique id, the name you chose, and the selector resolved from your selection. You can add multiple metrics per experience and remove a metric from the timeline or metric list when you no longer need it.

Save the activity so metrics persist on the experience.
What you see in reporting
For a given personalization activity, reporting can summarize clicks and unique visitors who clicked, including breakdowns by metric (each named metric with click counts and unique clickers). You can also analyze view totals and unique viewers for the experience. Filters such as date range and visitor type (for example unique vs. repeat) help you narrow the window when comparing campaigns or A/B runs.
Compare variants fairly
Define parallel metrics on Experience A and B—same names where the intent matches—then compare click and viewer signals after enough traffic. Traffic splits ensure each visitor stays in one bucket.
Stable selectors
Prefer elements whose selectors stay valid after small CMS edits. If the DOM structure changes, revisit the activity and re-tag the element so clicks keep attributing correctly.
Tip: Tag only a handful of decisive elements per experience—primary CTA, secondary offer, and one or two navigation or trust links—so reports stay focused. Avoid tracking every link on the page unless you truly need that granularity.
Audiences & delivery conditions
URL rules choose the stage; audience rules choose the cast.
Think of targeting as two filters that both need to agree before a visitor sees your personalized experience (unless you leave audiences empty, in which case URL rules alone decide). URL conditions answer: “Is this the right page or flow?” Audience conditions answer: “Is this the right person or session?”
That split is powerful. You might run one activity on every blog post URL but only for return visitors, or personalize checkout for people in a saved audience built from your segments—without maintaining separate URLs for each segment.
Types of audience conditions
PRZIO supports four condition types. You can mix them in one activity and control how they combine.
New visitor
Targets people on an early-session signal—ideal for welcome banners, first-time discounts explained in plain language, or softer CTAs before you ask for deep commitment.
Return visitor
Targets visitors who already have a relationship with the site—great for “welcome back” copy, skipping redundant explainer sections, or promoting advanced features.
Saved audience
Pick a saved audience (segment) from your project’s list. Use this when segments are built from behaviors, lists, or attributes you maintain in PRZIO—so the same definition powers personalization, popups, and reporting consistently.
Custom (setAudience)
Match on custom audience attributes your site sets via the SDK (for example industry, plan tier, or campaign code). Choose an attribute key, an operator, and a value—similar to filtering on profile fields you already send to PRZIO.
Combining conditions: Any vs. all
For multiple audience rows, you set a match mode: Any condition (OR) means the visitor needs to satisfy at least one row; All conditions (AND) means every row must pass. This mirrors how you think in plain language: “New visitor or from campaign X” versus “Return visitor and in the enterprise segment.”
Tip: Start with one or two simple conditions, activate, and validate in preview or on a staging domain before stacking many AND clauses—narrow targeting is powerful but easier to misconfigure when you are still proving the base experience.
Custom attribute operators
When a condition type is Custom, you choose how the attribute is compared. Value is not required when the operator is about presence alone.
| Operator | When to use it |
|---|---|
Equals / Not equals |
Exact match on a string (for example plan name pro vs. starter). |
Contains / Does not contain |
Substring checks—for example a region code inside a longer location string. |
Exists / Does not exist |
Whether the attribute was set at all—useful for “logged-in profile present” style checks without caring about the exact value yet. |
Adding audience conditions to an activity
Step-by-step in the PRZIO app—what you click and what it means.
Audience rules live in the activity’s delivery or targeting area (alongside URL conditions). You do not need an audience for every activity—if you skip this section, everyone who matches the URL rules can see the experience, subject to your traffic split when A/B testing.
-
Open the activity you are editing. From the personalization list, select the activity. Make sure URL conditions already reflect the pages you want; audiences layer on top of that.

Open the activity from the list (example URL only—no user names). -
Find audience targeting. Locate the section for audience or delivery conditions—the UI groups URL rules and audience rules so you configure a full targeting picture in one place.

URL and audience blocks appear together under targeting. -
Choose how rows combine. Set Any condition (OR) for inclusive segments, or All conditions (AND) when every rule must hold at once (for example return visitor and saved audience “High intent”).
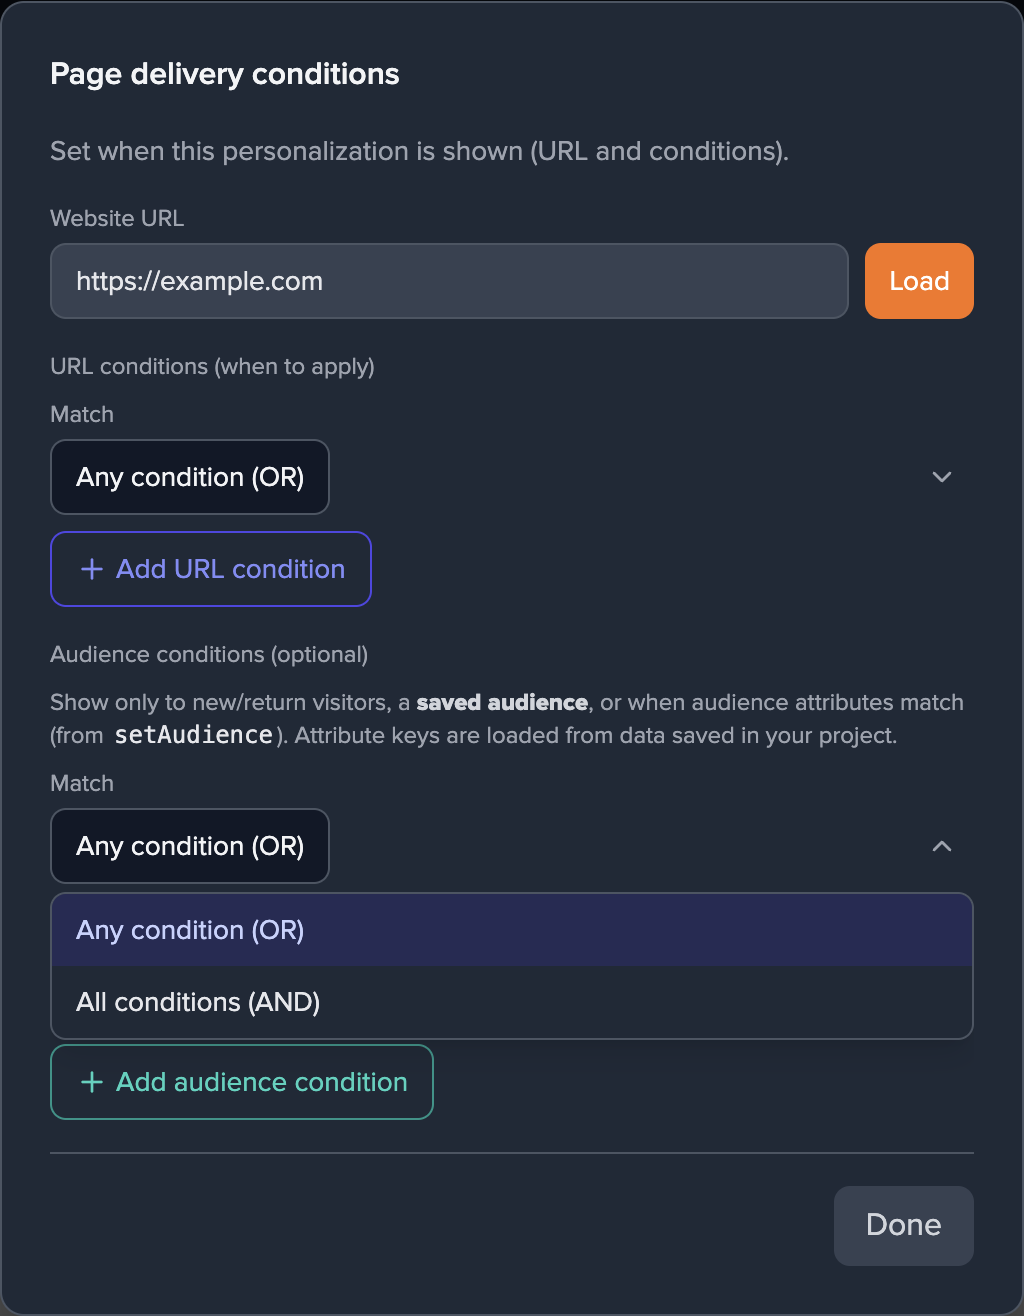
Pick AND vs OR before adding rows. -
Add a condition row. Use Add audience condition. For each row, pick a type: New visitor, Return visitor, Saved audience, or Custom (setAudience).
Add a row, then choose the condition type. -
Finish the row by type. For Saved audience, search and select a segment by name. For Custom, pick or type an attribute key, choose an operator, and enter a value (unless the operator is Exists / Does not exist). Remove a row with the trash control if you no longer need it.
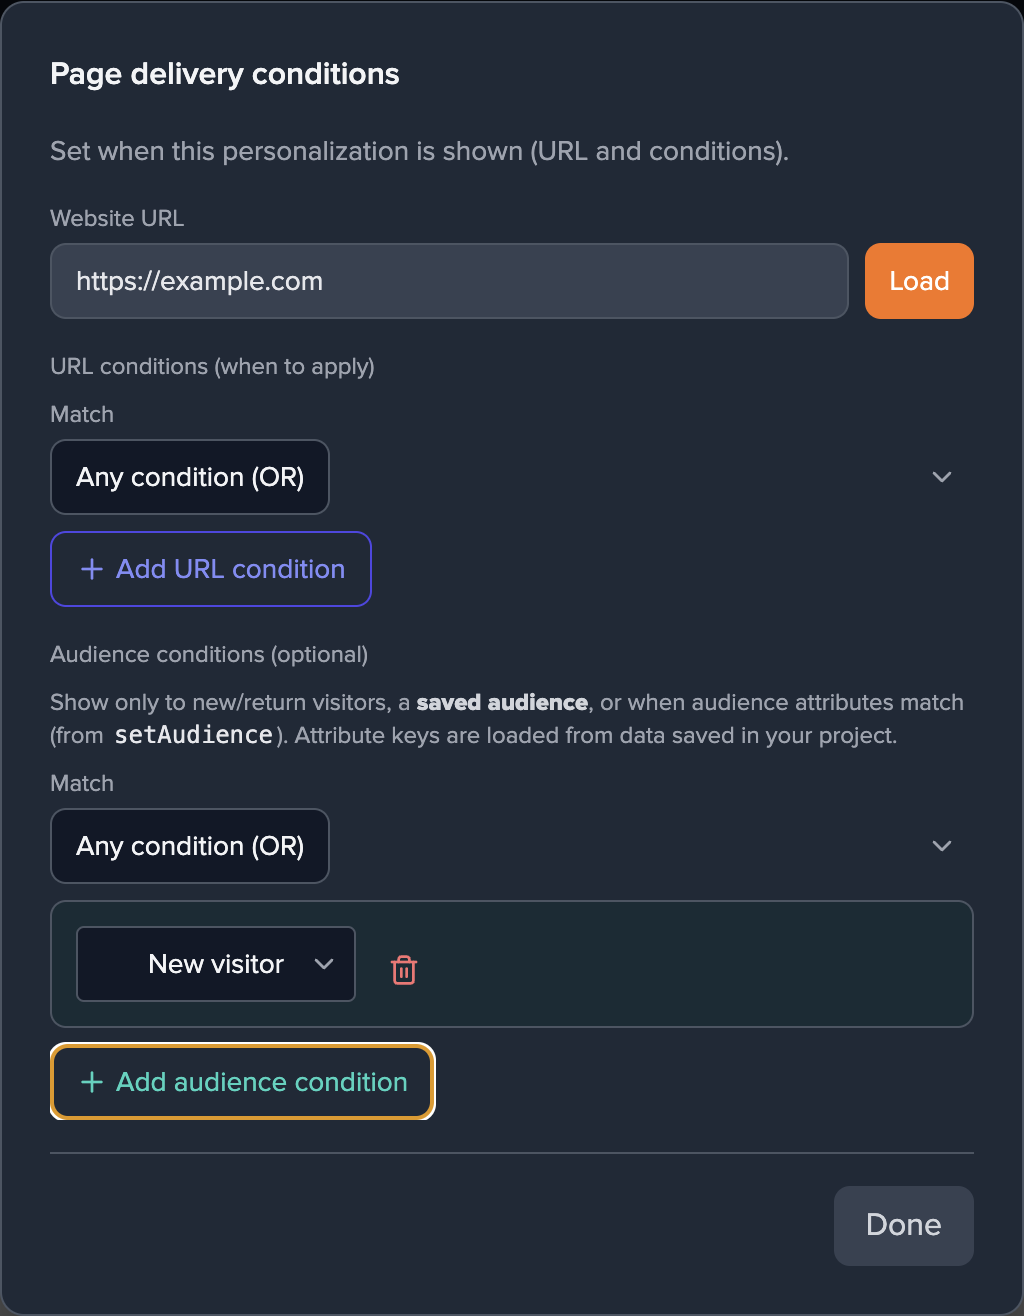
Configure each row (example: built-in visitor type); custom rows use SDK keys—no personal names. -
Save and verify. Save the activity, use preview where available, and confirm on a test browser profile that matches (or does not match) your rules. Then activate when you are confident.
Save, then validate with preview or a test profile.
Custom attributes and your site: Custom conditions only work when your implementation sets the corresponding audience fields through PRZIO’s APIs or helpers (often referred to in the stack as setAudience-style profile data). Coordinate with your developer so keys and values match what you configure in the UI.
Sample audiences you can create
Concrete recipes—adapt names and values to your business. Saved audiences are built in your segments area; custom keys must match what the site sends.
Recipe: New visitor AND URL matches your product or promo page.
Idea: Explain shipping and returns clearly; use a softer primary CTA and a short trust strip.
Recipe: Return visitor OR saved audience “Past purchasers” if you maintain that segment.
Idea: Swap hero copy to reorder or loyalty messaging; hide beginner explainer blocks.
Recipe: Saved audience “Enterprise leads” (built from form fills, firmographic data, or sales lists you sync).
Idea: Show security, SSO, and annual billing on the pricing page; add a “Talk to sales” insertion.
Recipe: Custom attribute utm_campaign equals spring_sale (your site must set this attribute when UTM params are present).
Idea: Align hero headline and banner with the campaign promise for perfect message match.
Recipe: Custom country equals DE or contains a region code you pass from your CDN or app.
Idea: Localize proof points, currency hints, or compliance copy without separate URLs for every locale.
Recipe: Custom plan equals business AND saved audience “Active trial”.
Idea: Surface upsell modules or in-app integration CTAs only for accounts that already show intent.
These examples mix built-in, saved, and custom types so you can model both quick wins (new vs. return) and precise GTM motions (segments and attributes). Name segments clearly in the audience library so every teammate knows who “Enterprise leads” or “Spring promo responders” refers to.
A/B testing & personalization
Experiences, traffic allocation, and winners—inside one activity.
When you enable A/B testing, the activity contains multiple experiences—for example a control and one or more challengers. Each experience carries its own personalizations, insertions, and click metrics. You assign traffic splits that must total 100%; each visitor is bucketed into one experience for that activity so they see a consistent variant on repeat views.
Audience rules still apply before the split: only visitors who match your URL and audience targeting enter the experiment. That lets you run a clean test on a segment (for example return visitors only) without diluting results with traffic that was never eligible for the hypothesis.
Track click metrics on decisive elements (primary CTA, pricing tier cards, etc.) to compare experiences. The activity can carry A/B test status (such as running or paused) and, when you have a decision, a winning experience for reporting and rollout.
A/B testing use case examples
Illustrative scenarios—pair with the audience ideas above for sharper tests.
Hero headline duel
Split 50/50 on two value props; audience: all URL-matched visitors or “New visitor” only if you want onboarding-specific language.
Monthly-first vs. annual savings
Two pricing hero layouts; measure clicks on “Start trial” and “Contact sales.” Layer saved audience “SMB” vs. “Enterprise” as separate activities if motions differ.
Trust & reassurance strip
Control vs. variant with shipping and guarantee copy above the pay button; track the payment step click or next-step metric you defined.
Promo vs. minimal header
Return visitors see a personalized promo bar in one experience; control keeps the header quiet. Compare engagement on high-value nav links.
AI-assisted personalization
Move faster from idea to on-brand copy—without outsourcing judgment.
PRZIO is designed so you are not stuck staring at empty text fields. Where AI assistance is enabled for your workspace (via project or app settings and your team’s keys or policies), you can generate and refine headlines, body copy, and CTAs in the editing flow—ideal when you are spinning up a second experience for an A/B test or tailoring tone for a segment you already targeted with audience rules.
Practical patterns: ask for three alternative headlines and pick one to edit; shorten verbose hero text for mobile-heavy traffic; shift tone (more formal vs. more direct) for B2B vs. prosumer segments; draft microcopy for inserts and banners. The model proposes; your team approves. Nothing ships without your review—brand, legal, and factual accuracy stay in your hands.
Note: AI availability depends on your organization’s configuration. Connect or request keys in settings as your admin allows; if AI is off, you can still personalize fully using manual copy and the audience tools described above.