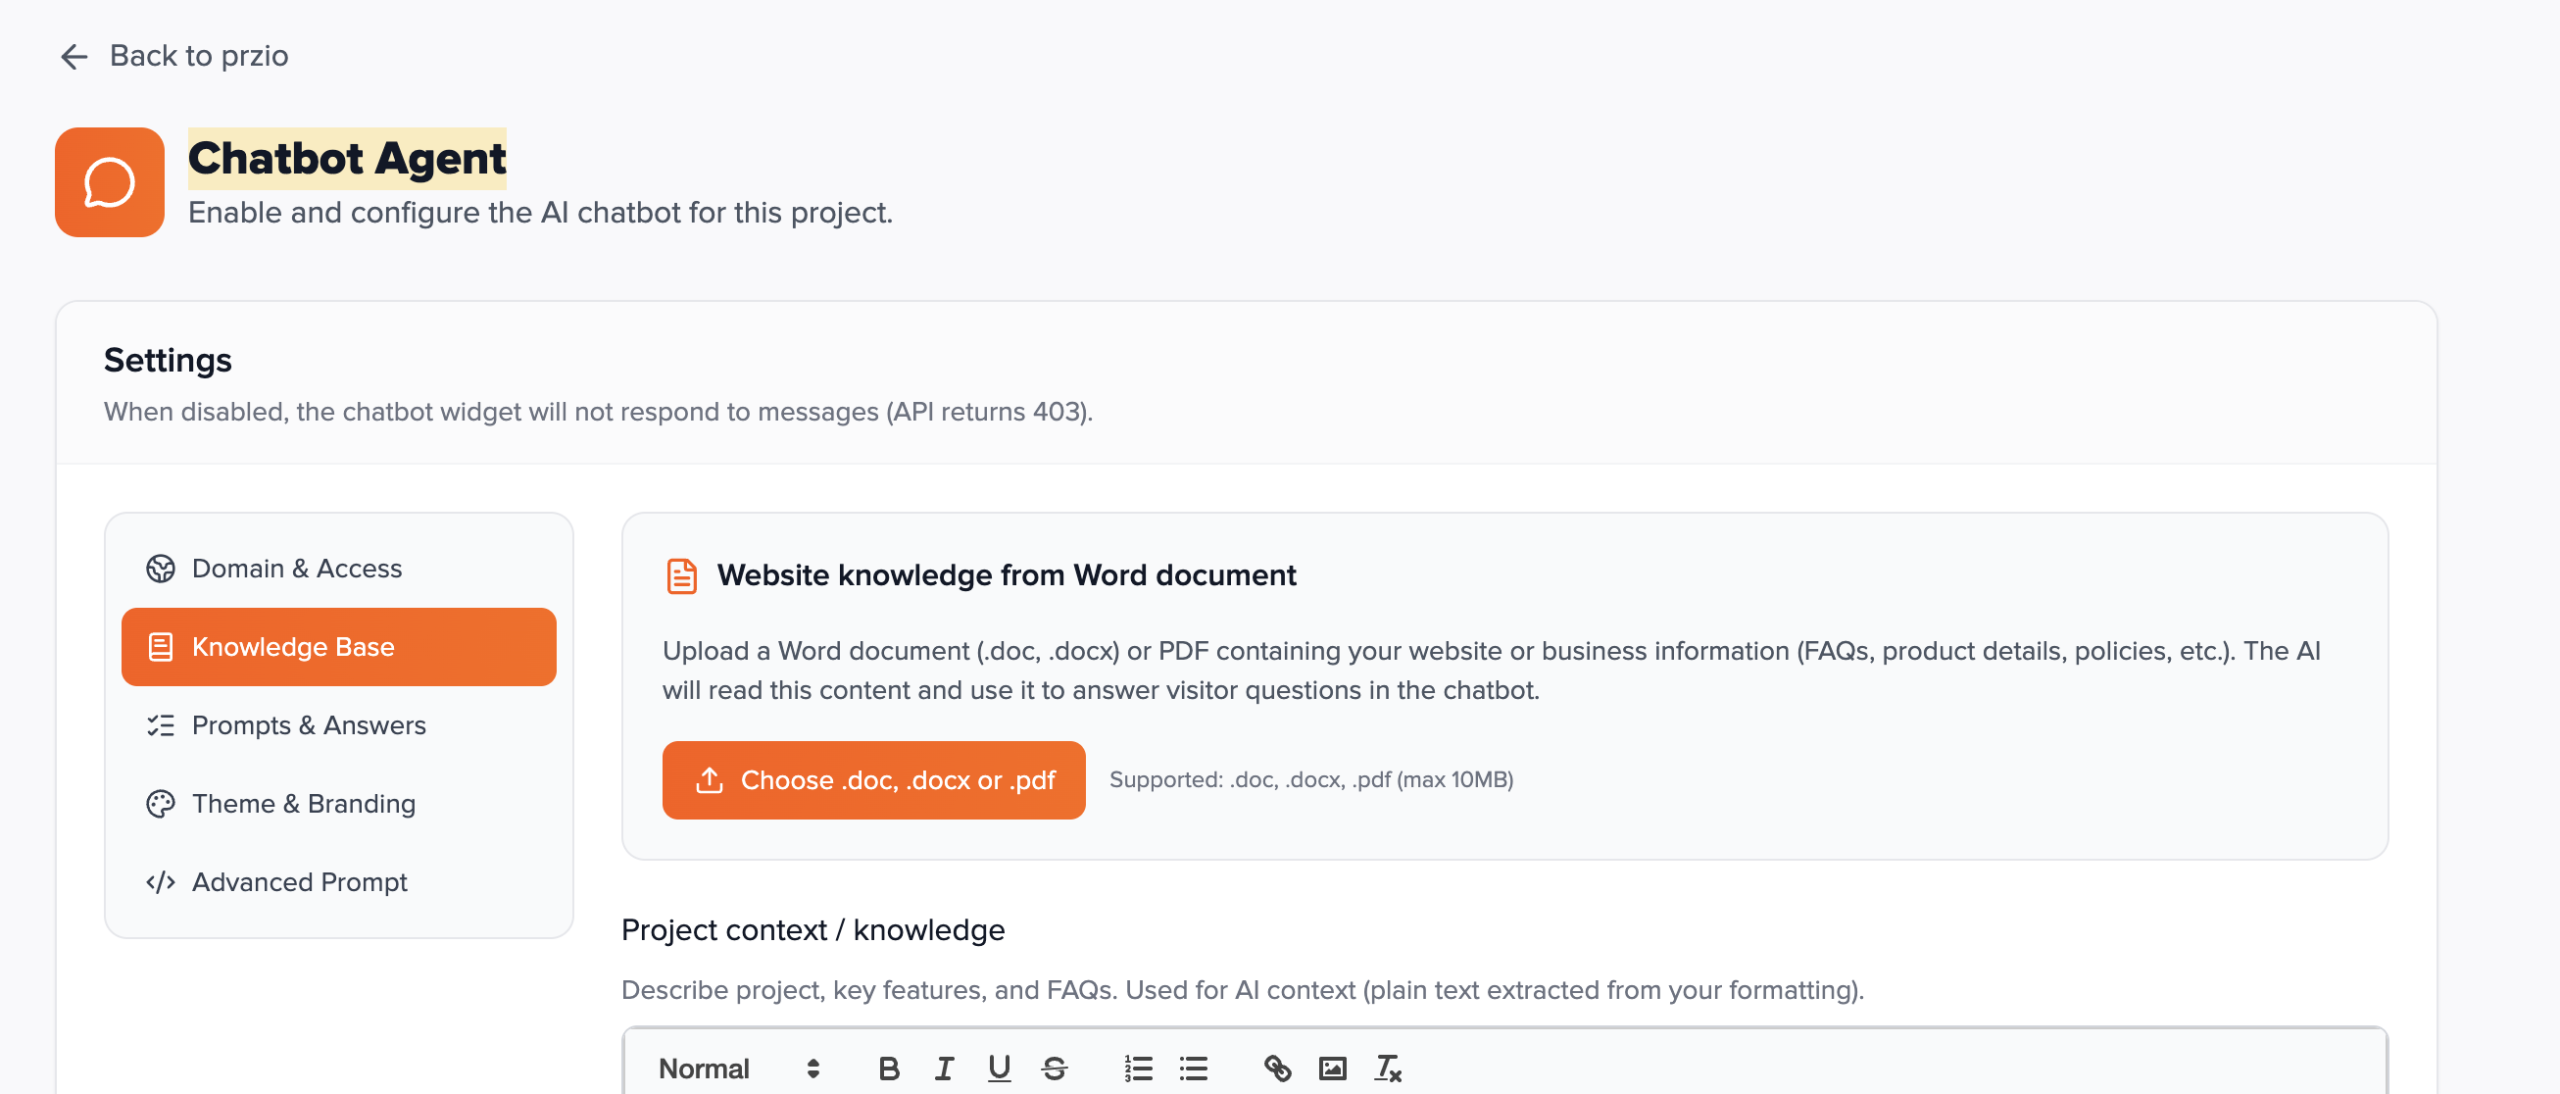
Chatbot Agent
Add an AI support widget to any site with one script tag. Configure knowledge, branding, and allowed domains in Przio; visitors chat through your project API key and hosted endpoints.
Overview
The Chatbot Agent loads chatbot-widget.js from your Przio app host. It fetches public
config (welcome text, theme, quick links) and sends visitor messages to the chat API.
Replies are generated with your configured OpenAI or OpenRouter keys (environment or admin/project AI settings).
Prerequisites
- A Przio project and an active API key (used by the widget for config + chat).
- AI provider configured so the backend can call the model — e.g.
OPENAI_API_KEYorOPENROUTER_API_KEYon the server, or keys set in Przio admin / project AI settings. - In the app: open Project → Chatbot (or your chatbot settings screen), turn the agent on, and fill knowledge/branding as needed.
If the chatbot is disabled for the project, the chat API returns 403 and the widget will not receive answers.
Dashboard setup
Open your project in the Przio app and go to Chatbot Agent (project chatbot settings). Options are grouped into sidebar tabs: Domain & Access, Knowledge Base, Prompts & Answers, Theme & Branding, and Advanced Prompt. Below, each option has a short summary and a longer explanation so you can configure the widget methodically before installing the script on your site.
Settings layout & saving
Use the left sidebar to switch tabs; click Save settings at the bottom after you change fields (document upload saves immediately).
The chatbot screen is split into a sticky sidebar of tabs and a main panel. Most text fields, toggles, colours, and URL rows only take effect after you press Save settings. The exception is the knowledge base file upload: choosing a file uploads it to the server, extracts text, and updates the project in one step—then you still use Save settings for any other edits you made in the same session. If you navigate away without saving, non-upload changes may be lost.
Domain & Access tab
This tab controls whether the agent runs at all, which sites may use the API, the first message visitors see, and whether the panel opens automatically.
Enable Chatbot
Master switch: when off, the widget cannot get useful replies (the API rejects chat requests).
Turn Enable Chatbot on as soon as you are ready for production traffic. While it is off, visitors may still see the bubble if the script is installed, but messages will not be answered successfully. This is the right control to use when pausing the agent during maintenance or before AI keys are configured.
Allowed domain(s) / subdomain(s)
Optional allowlist of hostnames; the chat API checks the visitor’s page URL and blocks unknown sites.
Enter one hostname per line or separate them with commas (for example example.com, www.example.com, shop.example.com).
When this list is non-empty, requests must include a page context URL whose host matches an allowed entry. This reduces abuse of your exposed browser API key.
The same topic is summarized under Allowed domains in this guide. Local development hosts such as localhost are typically recognized for testing—confirm behaviour in your environment if you use a tunnel or preview URL.
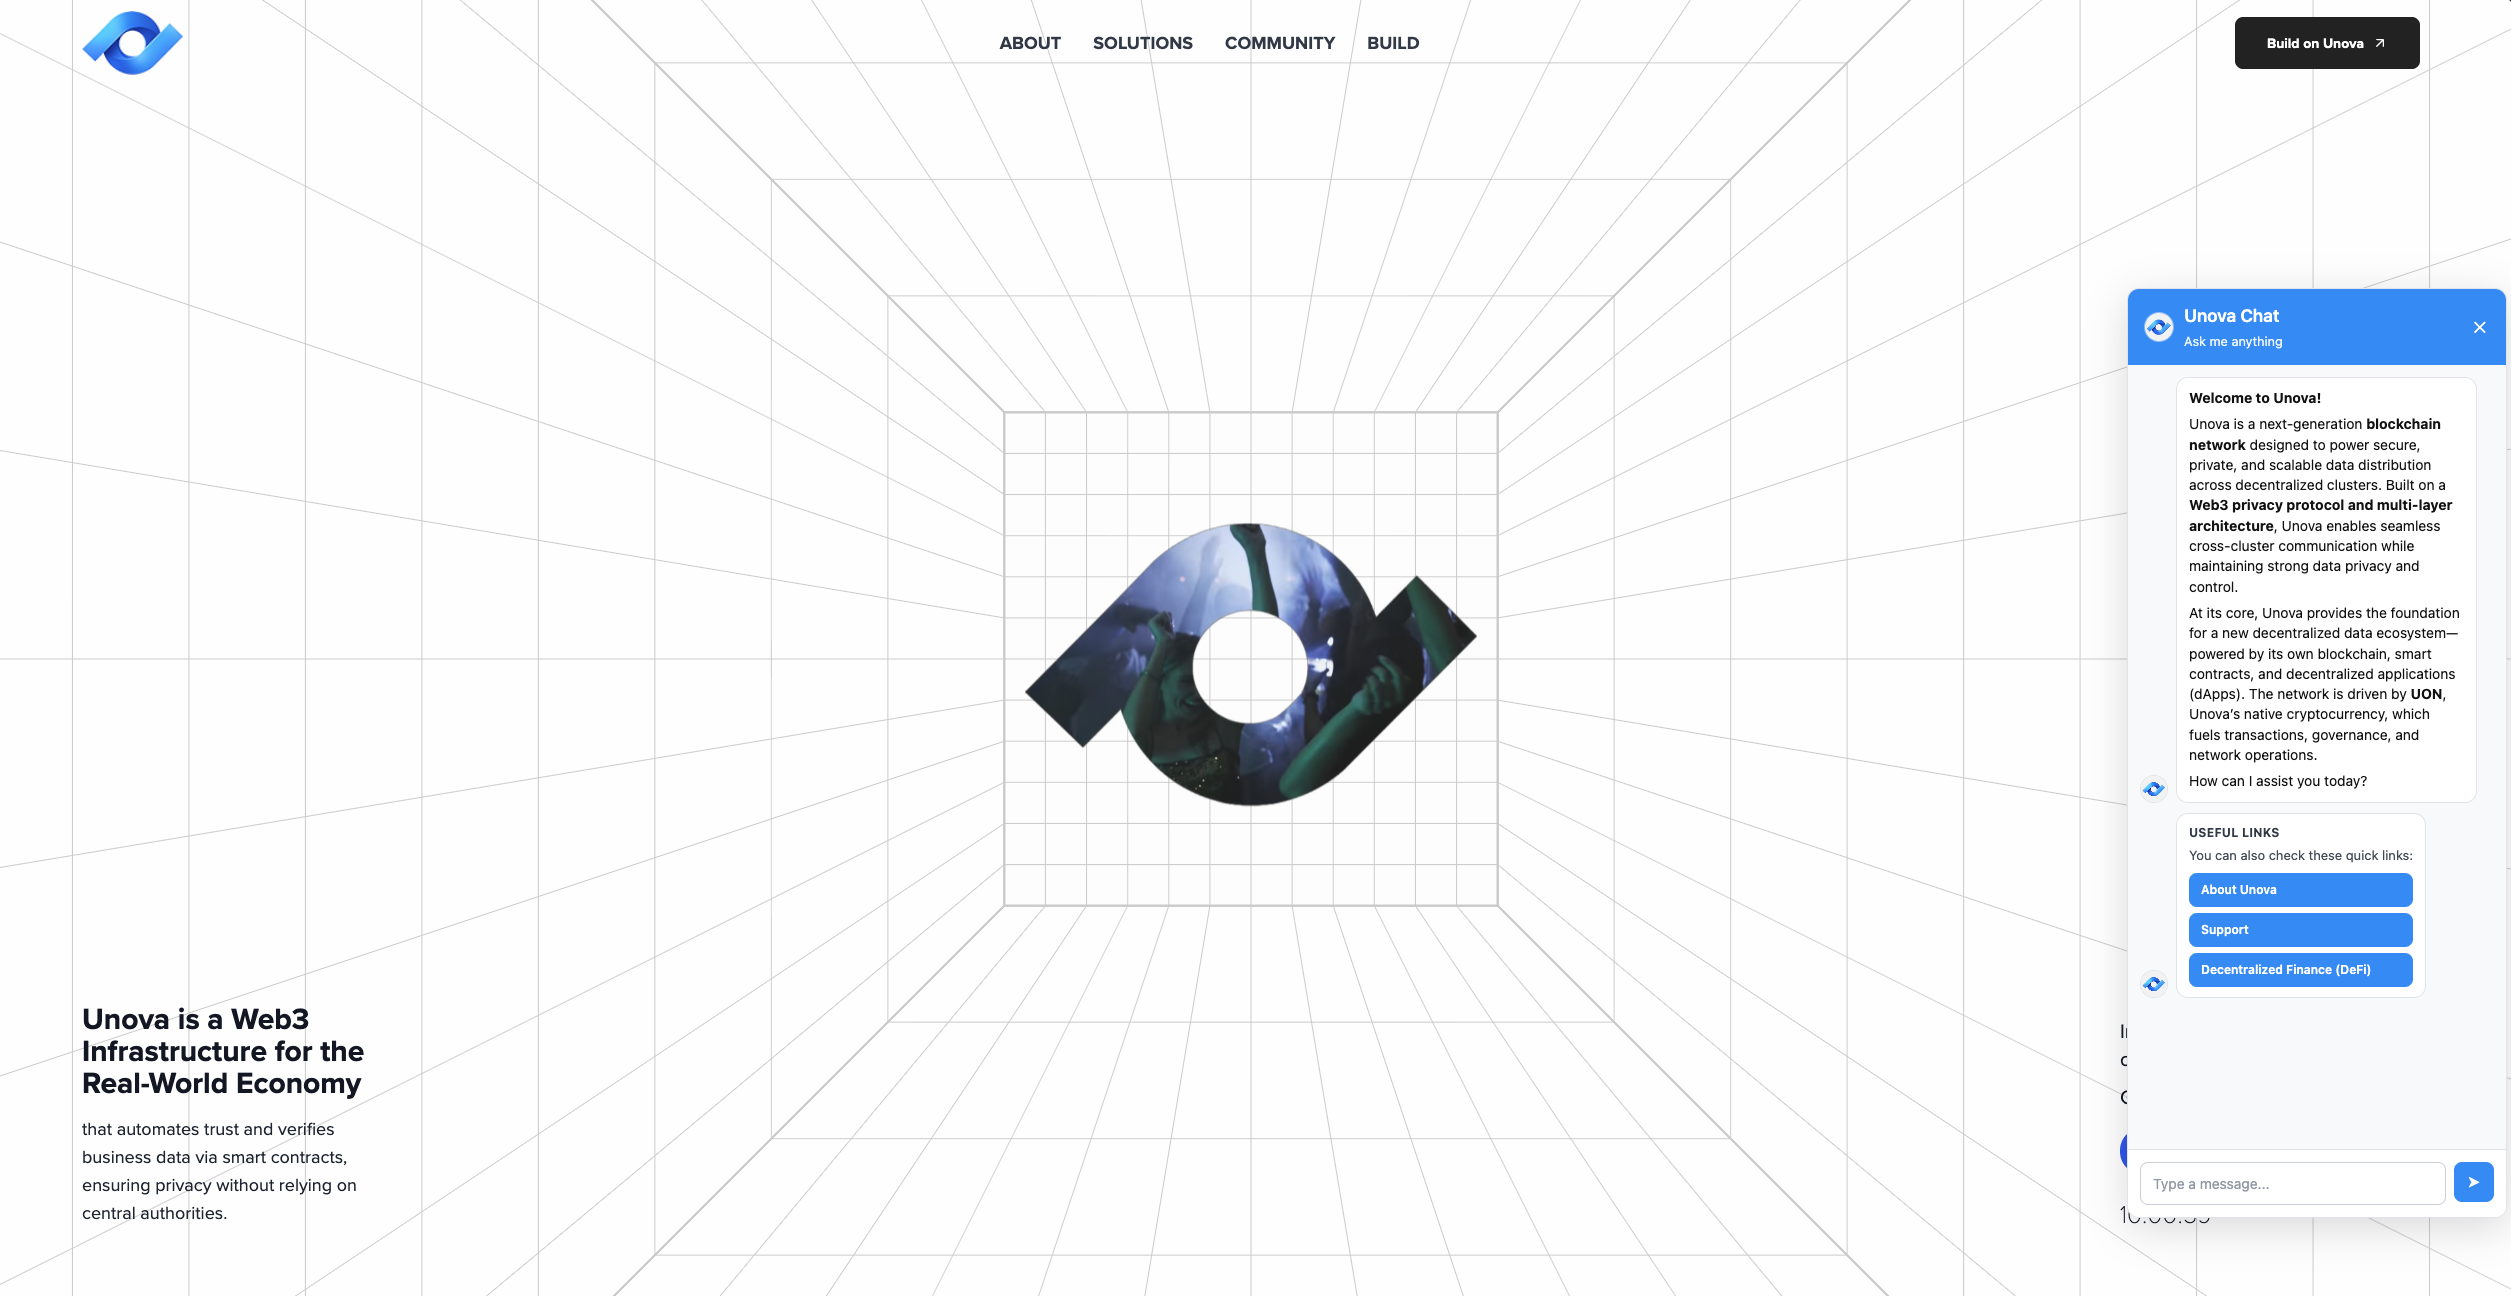
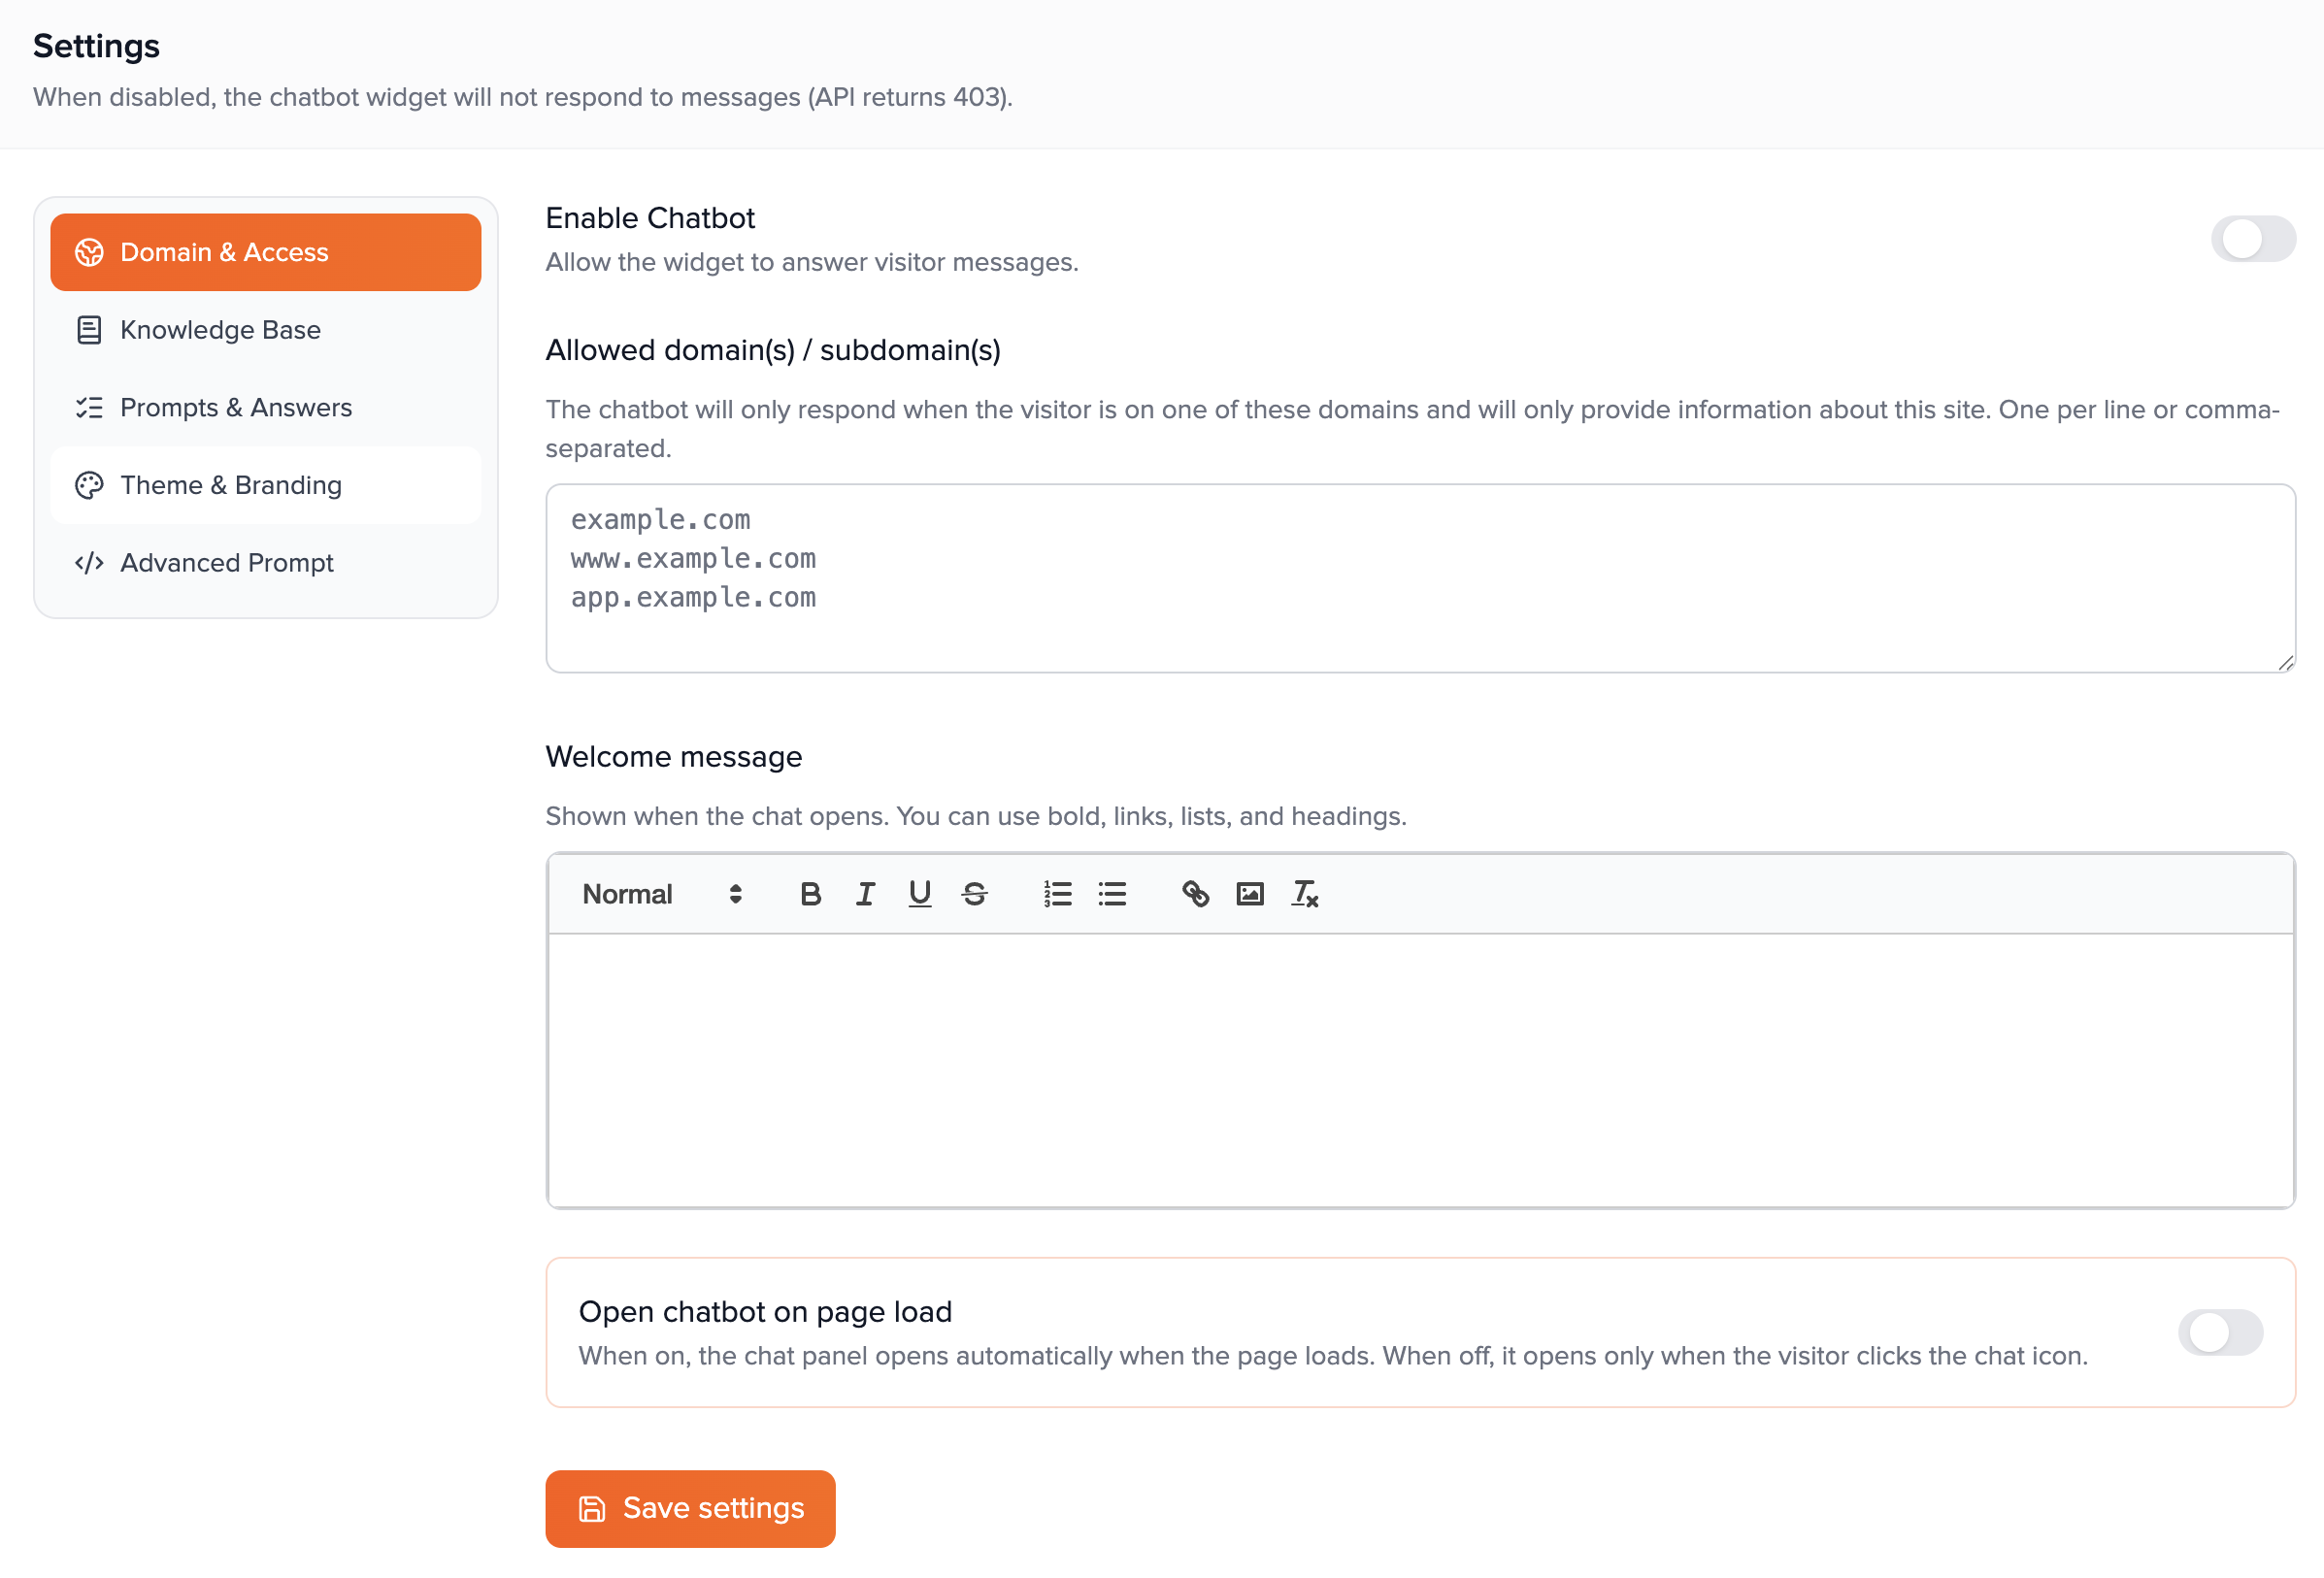
Welcome message
Rich text shown at the top of the chat when the panel opens—your first impression and instructions.
The welcome message appears before the conversation thread. You can use the rich text editor to add bold, links, short lists, and headings so visitors know what the bot can do and how to get human help. Keep it scannable: one short paragraph plus a bullet list of common intents often works well. This content is public configuration (loaded with the widget theme), so do not put secrets here.
Open chatbot on page load
If enabled, the chat panel opens automatically when the page loads; otherwise it opens only when the visitor clicks the floating button.
Use this for high-intent pages (support, contact, pricing) where you want immediate visibility. On content-heavy or landing pages, leaving it off avoids covering the layout before the user chooses to engage. Combine with a clear welcome message so auto-open feels helpful rather than intrusive.
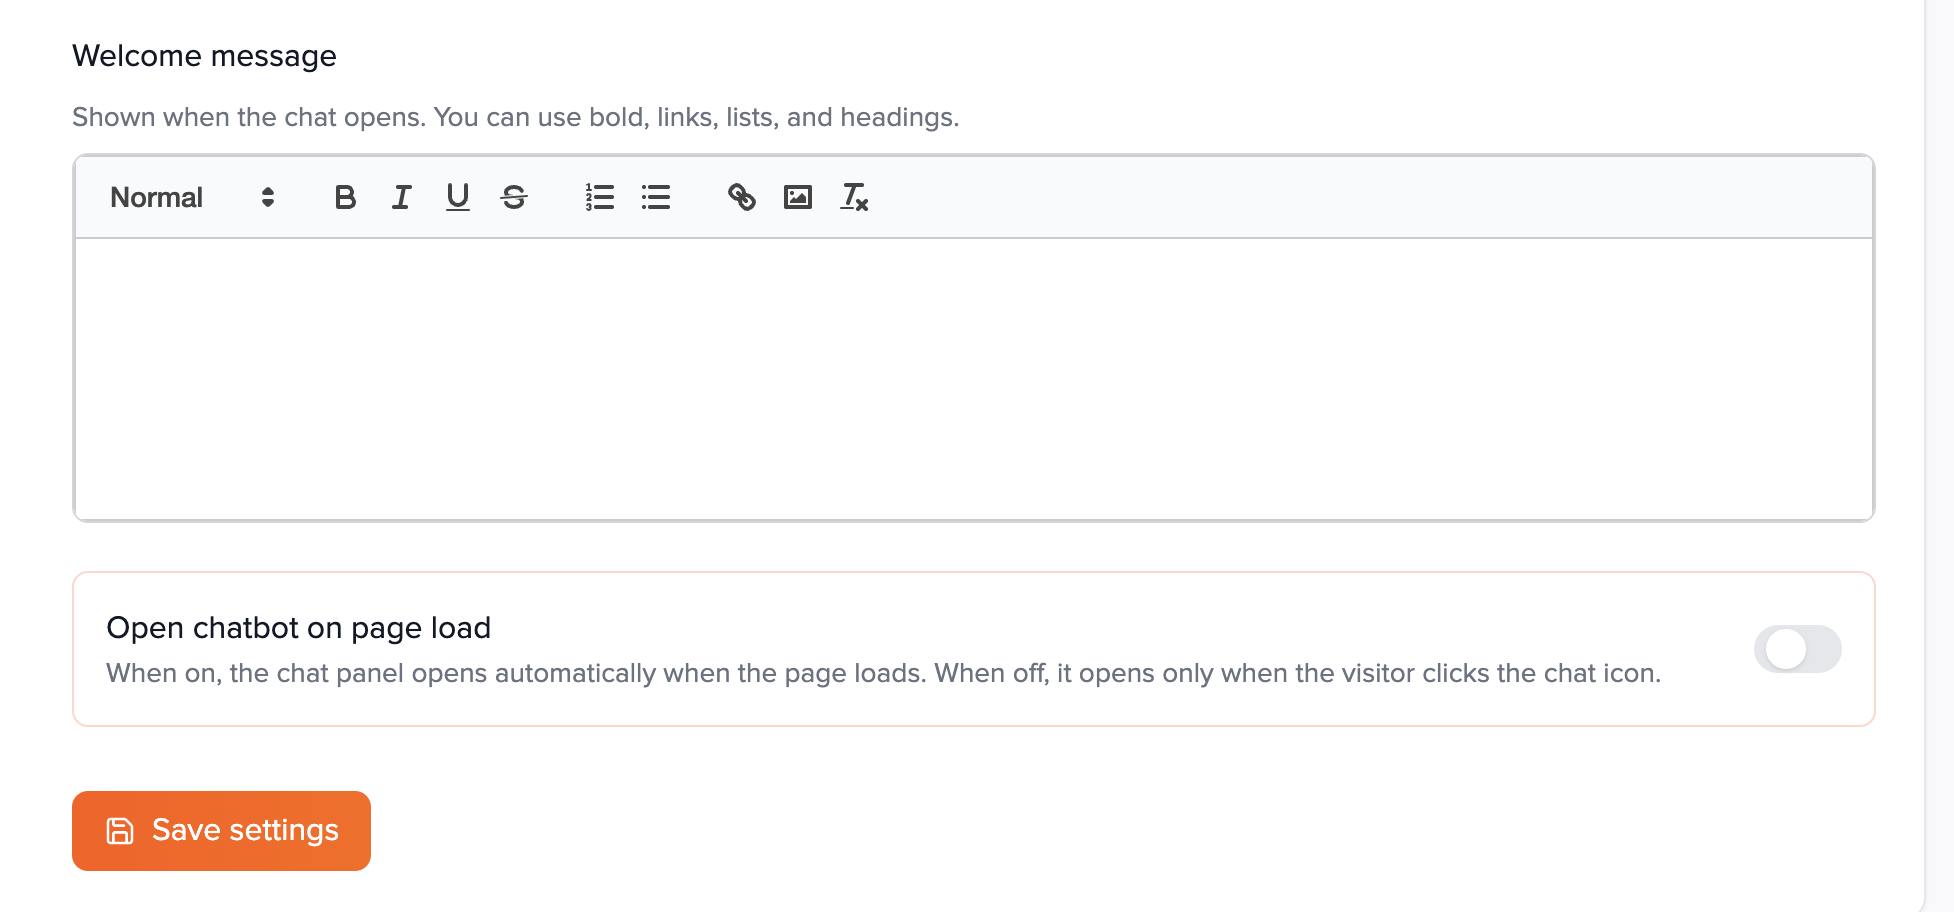
Knowledge Base tab — document upload
The block titled Website knowledge from Word document is for long-form reference material extracted from a file. This is separate from the shorter Project context and Business information fields below it on the same tab.
Upload a knowledge base document (.doc, .docx, .pdf)
Pick a file up to 10 MB; the server extracts text and stores it for grounded answers.
Steps: (1) Open the Knowledge Base tab. (2) Click Choose .doc, .docx or .pdf and select your file. (3) Wait for the success message—the upload calls the project’s knowledge-doc API, which reads the file and saves plain text on the project. (4) Confirm the UI shows Uploaded: with your filename.
What gets extracted: For .docx, body text is extracted. For legacy .doc, the service combines headers, body, and footers where available. For .pdf, text is extracted from pages (scanned images without OCR may yield little text).
Very long documents are truncated at a large character limit so the backend stays within model context constraints. Formatting, images, and complex tables may be simplified or omitted—prefer clean, text-forward source files for best results.
Who can upload: Project owner or ProjectAdmin members (others receive an error). Replacing a document: click Remove document first, then upload the new file—the UI only shows the file picker when no document is attached. Tip: Maintain a master document in Word or Google Docs (export to PDF or DOCX), version it internally, and re-upload when policies or catalogues change.
Knowledge Base tab — project context & business information
Project context / knowledge
Rich text describing the product, features, FAQs, and facts the model should treat as true for this project.
Use this for information you prefer to edit directly in the app rather than in a Word/PDF file. The editor content is converted to plain text for the AI, so structure it with clear headings and bullets in the editor for your own readability. Good candidates: product modules, pricing tiers (if public), terminology, links to canonical docs, and “always mention X when users ask about Y” notes. This field pairs well with the uploaded document: the file holds long policies or catalogues; project context holds concise, curated facts.
Business information
Brand voice, policies, SLAs, refunds, safety boundaries—how the assistant should sound and what it must respect.
Whereas project context is often “what we sell and how it works,” business information is “how we operate and communicate.” Include tone (formal vs friendly), words to avoid, escalation paths, regions you serve, compliance reminders, and cancellation/refund rules the bot must not contradict. Together with the knowledge document and suggested Q&A, this reduces hallucinated policies and keeps answers aligned with legal and brand requirements.
Knowledge Base tab — important URLs & quick links card
Important URLs
Label + URL rows the assistant and UI can surface as trusted destinations (pricing, docs, status page, contact).
Click + Add URL for each link. Fill Label (short text visitors see) and the full https:// URL. These entries feed both the model’s context (so it points users to the right pages) and optional UI “pill” style shortcuts when combined with the next setting. Remove rows you no longer need with the minus control. Keep labels parallel (“Pricing”, “Docs”, “Contact sales”) for a cleaner chat experience.
Show important links on first open
When on, after the welcome message the chat shows a quick-links card using your important URLs.
Toggle Show important links on first open to match your design: some teams only want links inside assistant replies; others want a visible card immediately. Set Quick links title (e.g. “Useful links”) and Quick links intro message (e.g. “You can also check these quick links:”) to match your brand voice. Ensure every URL you intend to display is valid and HTTPS where possible.
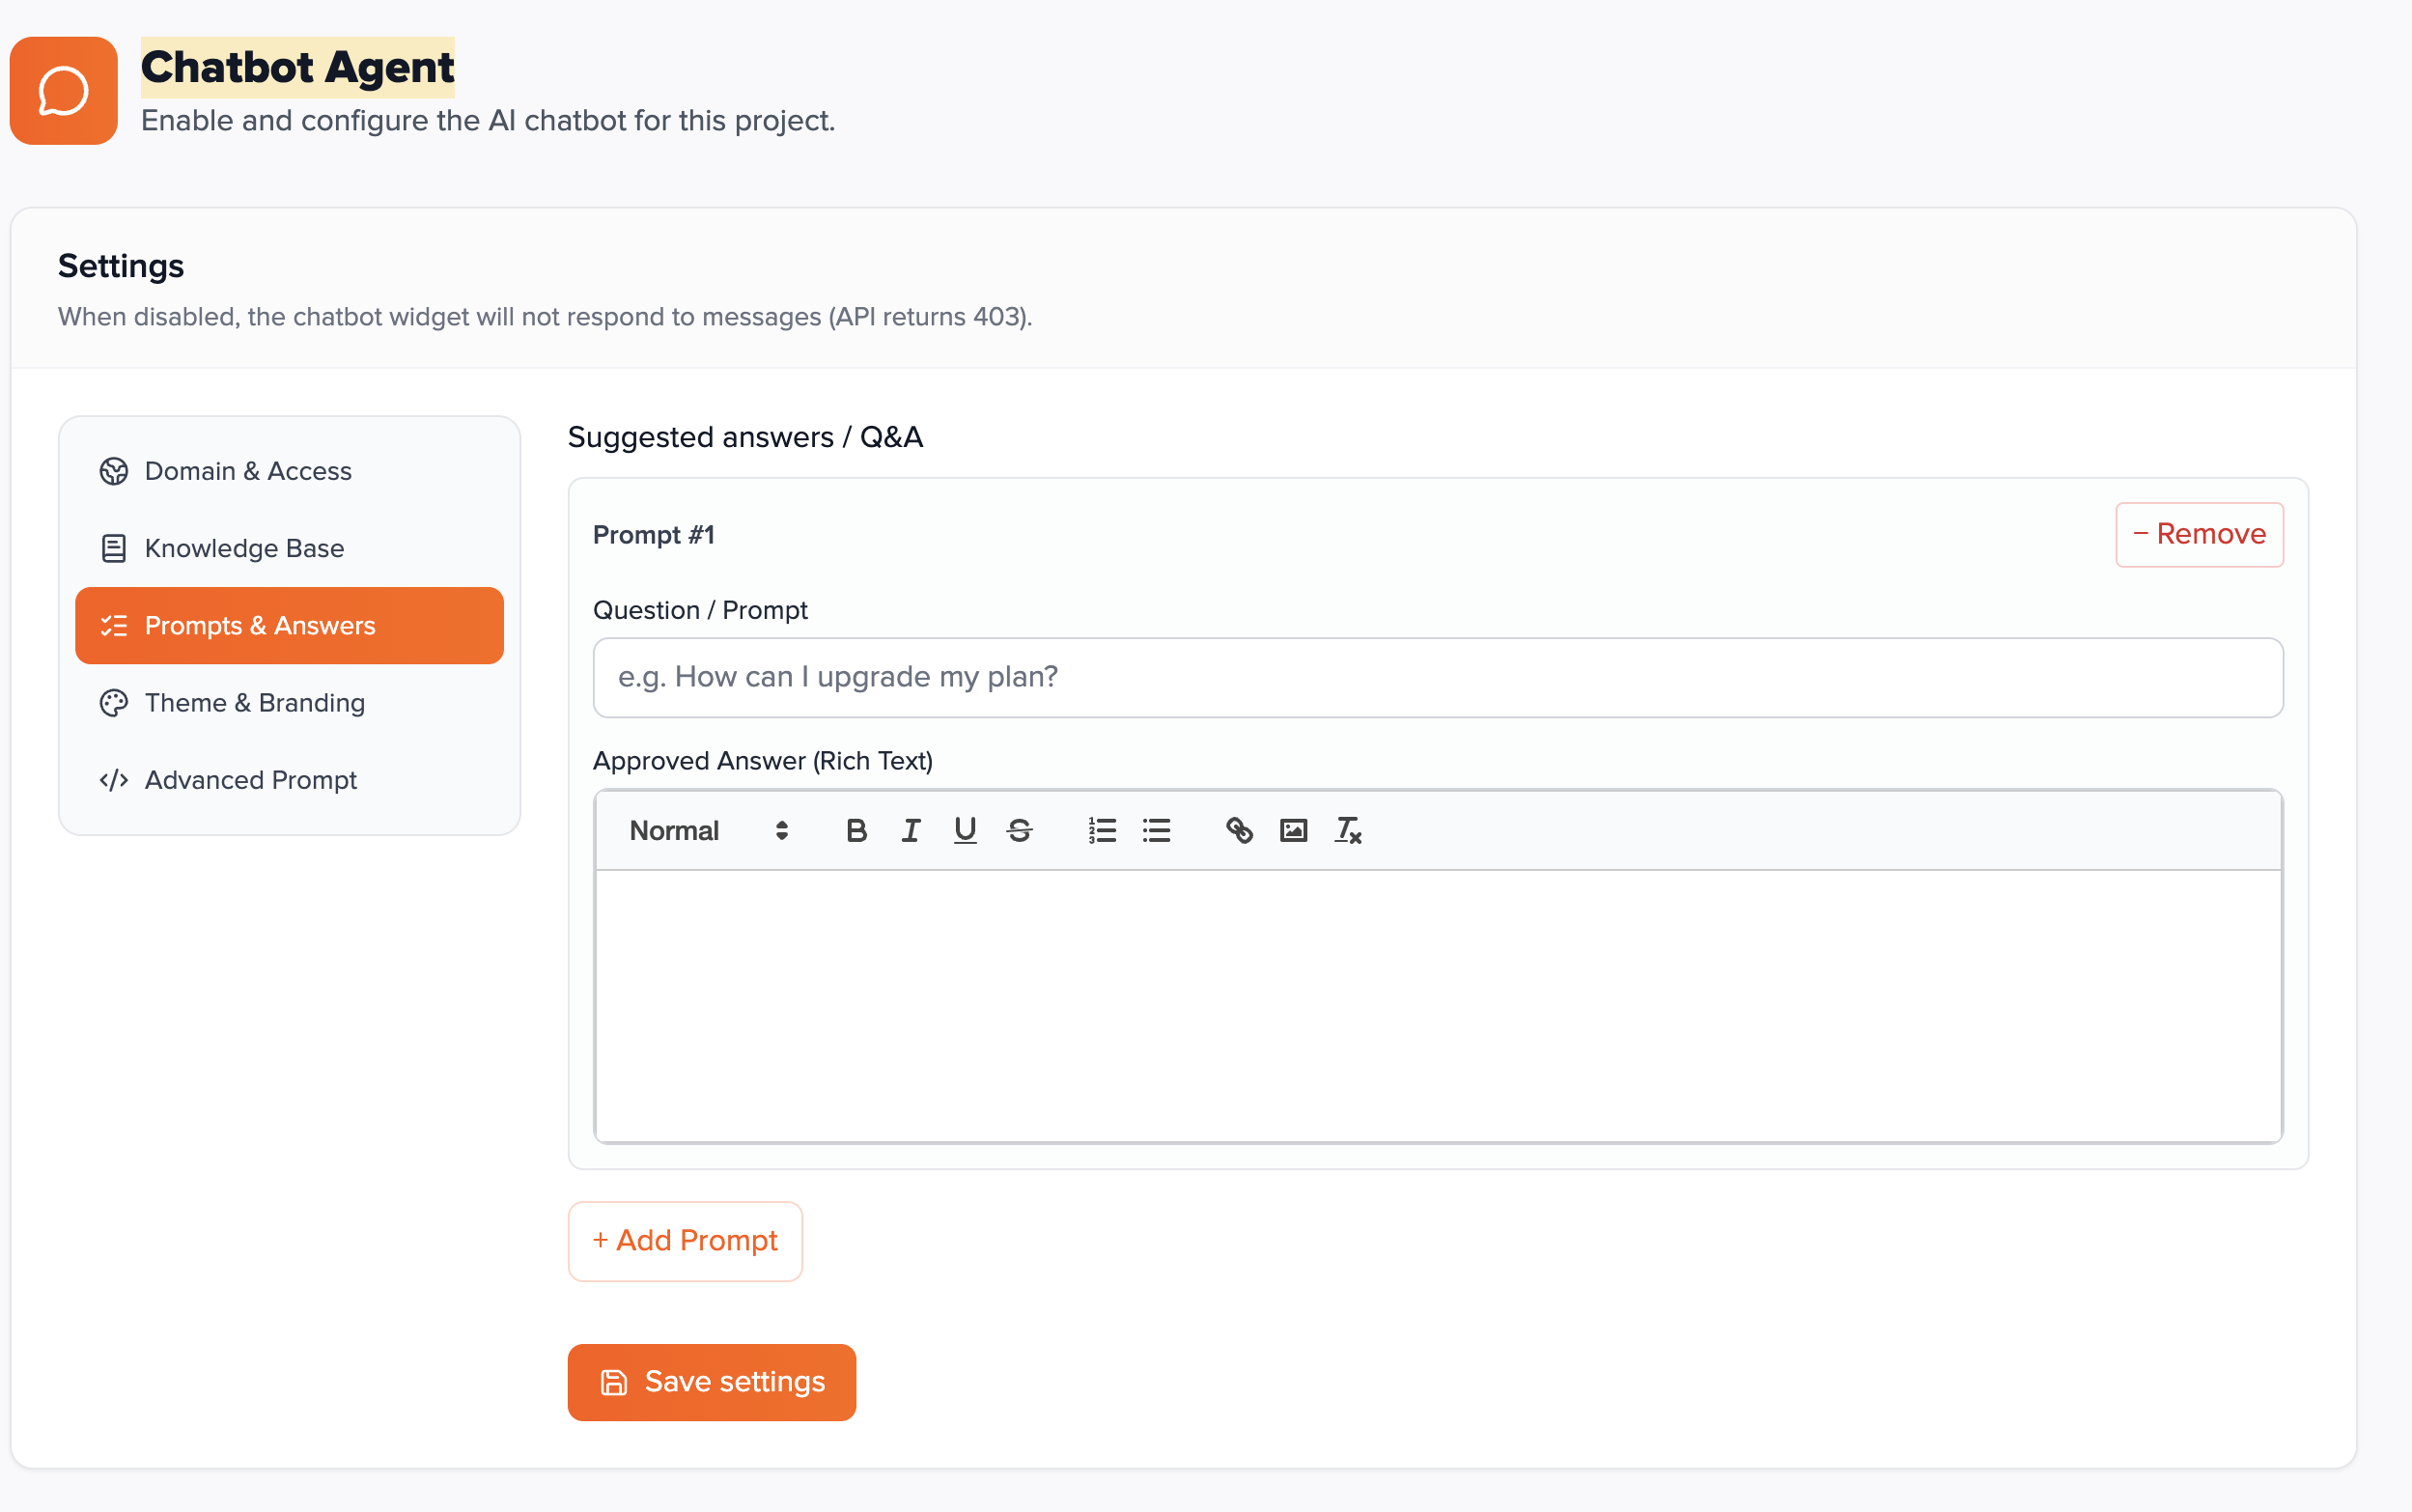
Prompts & Answers tab — suggested Q&A
Suggested answers / Q&A
Structured prompts: each item has a question line and an approved rich-text answer the model can lean on.
Use + Add Prompt to create rows. The Question / Prompt field is the user-facing or matching phrase (e.g. “How do I upgrade my plan?”). The Approved Answer editor holds the canonical reply—formatting is preserved as HTML for display logic in the product. This is ideal for regulated or sensitive replies you want repeated consistently: billing steps, password reset flows, or warranty language. Maintain a small set of high-quality entries rather than dozens of rarely used ones; link out to docs for edge cases.
Theme & Branding tab
Controls colours, layout of the floating button, chat header copy, assistant avatar, panel size, and component-level CSS. All of these ship to the browser via the public config endpoint, so keep assets on stable HTTPS URLs if you paste links manually.
Chatbot colour & bubble position
Primary accent colour (picker + hex) and which corner hosts the floating button.
Choose a hex that passes contrast checks against your page background. Position options are bottom/right, bottom/left, top/right, and top/left—pick one that does not cover your cookie banner, cart, or accessibility widgets.
Chat panel minimum & maximum height
CSS lengths such as 300px or 70vh to control how tall the panel feels on desktop and mobile.
Minimum height avoids a collapsed panel on long pages; maximum height prevents the chat from consuming the entire viewport. Test on a small phone and a large monitor after changing these values.
Floating chat button (default icon, image, or emoji)
The launcher visitors click to open chat—either the default glyph, an uploaded image, or a short emoji/icon string.
Default icon uses the built-in chat glyph. Image lets you upload a file or paste an image URL—good for brand mascots or a “Help” badge. Emoji / icon accepts a small text value (e.g. 💬) shown inside the circular button. Keep custom images square and lightweight for fast loads.
Header title, subtitle, and agent profile
Chat window title lines plus the avatar beside assistant messages (photo upload, URL, or emoji mode).
Set Chat header title and Chat header subtitle to match your site (e.g. “Acme Support” / “Typically replies in minutes”). Under Agent profile photo, choose Use Profile Image and upload or link a headshot, or Use Icon and enter an emoji such as 🤖. The header preview in the dashboard shows how title, subtitle, and avatar work together.
Header appearance (CSS)
Optional padding and title/subtitle colours for the chat header strip.
Leave blank to use defaults. When set, values should be valid CSS (e.g. padding 14px 16px, colours as hex). Use this to align the widget header with your navbar or dark-mode theme.
Input box & send button CSS
Property-only snippets applied to the message field and send control—no selectors in these boxes.
Enter declarations such as border-radius: 8px; or background: #f9fafb;. The product merges them onto the built-in elements. For deeper restyling (hover states, message bubbles, panel border), use the custom CSS textarea below in the same tab.
Custom CSS
Full rules targeting widget classes: root wrapper, header, panel, messages, bubble, input, send button, etc.
The UI lists example class names such as .przio-cb-wrap, .przio-cb-header, .przio-cb-panel, .przio-cb-bubble, and message list classes. Test changes in a staging site: overly broad selectors can affect layout on mobile. Prefer small, incremental rules and verify tap targets remain at least ~44px where possible.

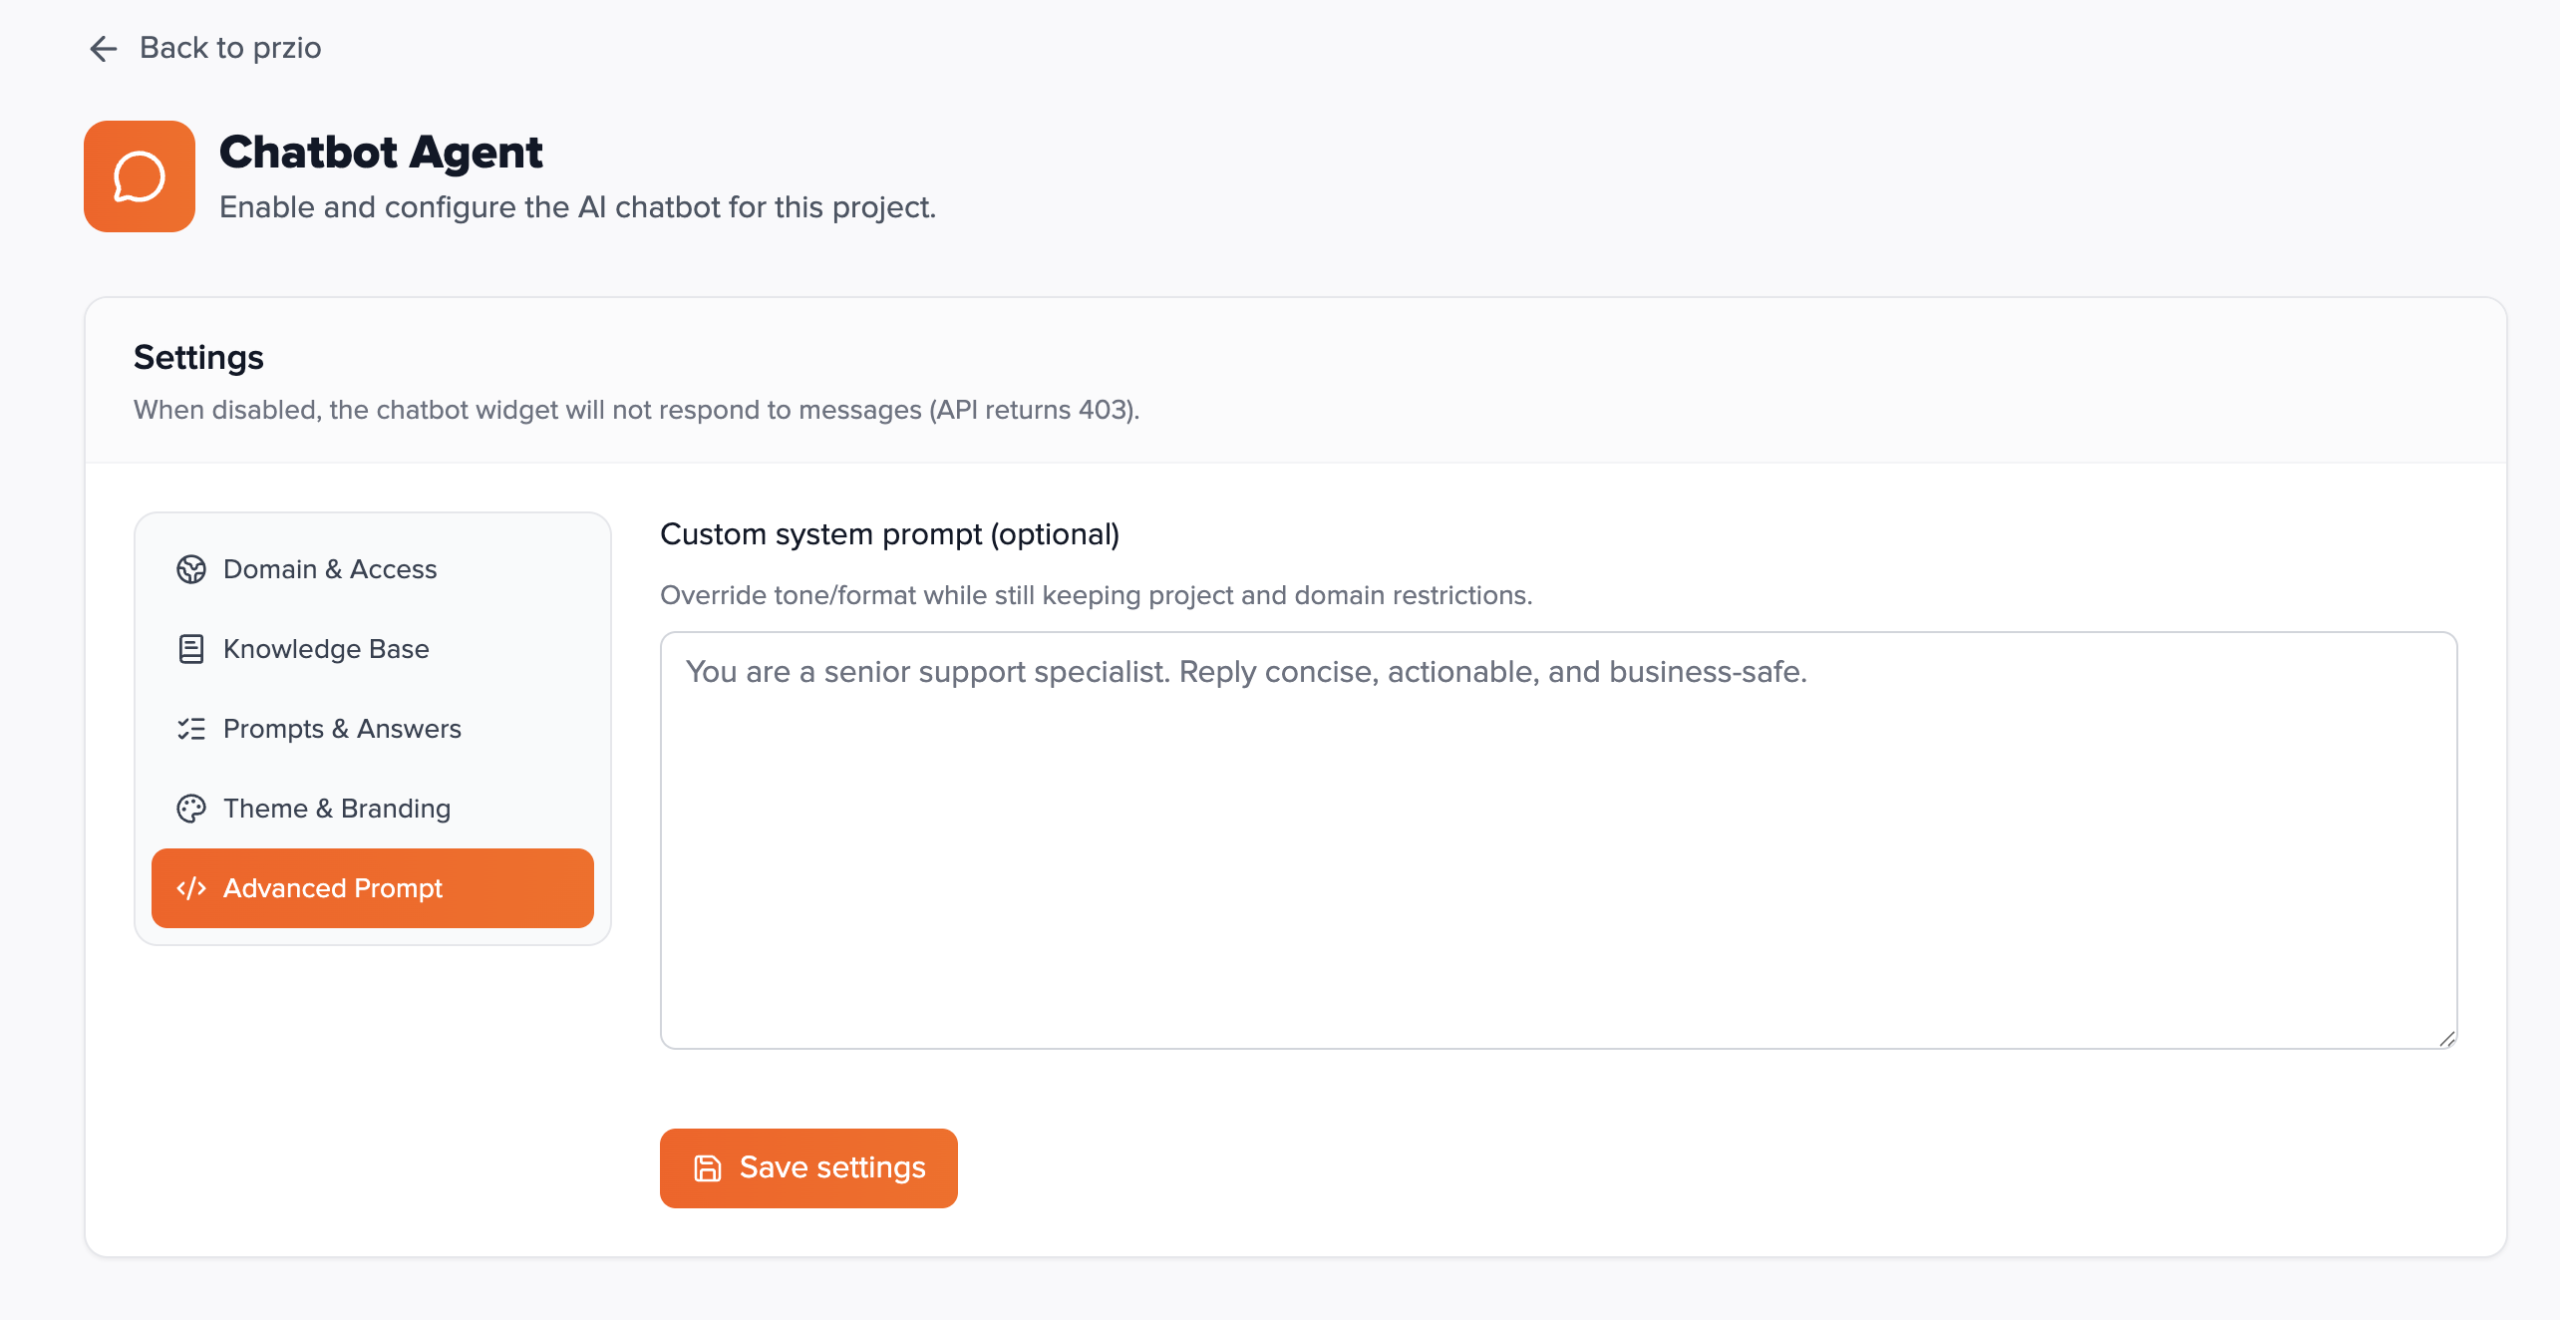
Advanced Prompt tab
Custom system prompt (optional)
Overrides default assistant instructions while project knowledge and domain rules still apply.
Use this when you need a specific persona (“You are a senior support specialist…”), output format (bullets, length limits), or language behaviour. Leave empty to use the product default. Keep overrides maintainable: document internally why a custom prompt exists so future edits do not conflict with Business information or legal policies.
Open chatbot on page load and most styling fields live under Domain & Access and Theme & Branding respectively—not under Advanced Prompt. Only the system prompt override is confined to the Advanced tab; custom CSS for the panel lives in Theme & Branding.
Install the widget
Add the script near the end of the page (e.g. before </body>). Replace placeholders with your project ID, API key, and Przio app base URL.
<script
  src="https://app.przio.com/chatbot-widget.js"
  data-base-url="https://app.przio.com"
  data-project-id="YOUR_PROJECT_ID"
  data-api-key="YOUR_API_KEY"
  async
></script>
Alternatively, set window.PrzioChatbotConfig = { baseUrl, projectId, apiKey } before the script loads.
The API key is exposed to the browser — restrict usage with allowed domains (see below) and rotate keys if a site is compromised.
API & security
Public endpoints used by the widget (CORS-enabled, authenticated with the same API key):
| Endpoint | Method | Purpose |
|---|---|---|
/api/chatbot/config |
GET | Widget theme, welcome message, quick links, header copy, etc. |
/api/chatbot/chat |
POST | Send user message + optional history; returns assistant reply. |
Headers: X-API-Key: YOUR_KEY or Authorization: Bearer YOUR_KEY
Chat body (JSON): message (string, required), optional messages (history array), optional context with url and title for the current page (the widget sends this automatically).
If AI is not configured on the server, the API responds with 503 and an error message about missing provider keys.
Allowed domains
You can list allowed hostnames in chatbot settings. When set, the chat API checks the visitor’s page URL from
context.url. Requests from other hosts receive 403 with a message to add the site in settings.
Local development hostnames such as localhost are typically allowed when testing.
JavaScript API
After load, the widget exposes:
if (window.PrzioChatbot && window.PrzioChatbot.open) {
  window.PrzioChatbot.open();
}
if (window.PrzioChatbot && window.PrzioChatbot.close) {
  window.PrzioChatbot.close();
}
Use this from your own buttons, campaigns, or A/B tests.
Implementation checklist
- Project created; API key generated and copied.
- Chatbot enabled and copy/theme finalized in Przio.
- AI keys available to the Przio backend.
- Script on site with correct
data-base-url,data-project-id,data-api-key. - Allowed domains updated if you use the allowlist.
- Smoke test: open chat, send a message, confirm reply and link previews if used.
FAQ
Why is the bubble missing?
Check the browser console for [Przio Chatbot] warnings — usually missing data-base-url or data-api-key. Confirm the script URL matches your Przio host.
Why do I get “AI provider not configured”?
The server needs OpenAI or OpenRouter credentials. Configure them in your deployment environment or Przio admin/project settings.
Why does the API say the domain is not allowed?
Add your site’s hostname (without path) to allowed domains, or temporarily clear the list to disable the check (not recommended for production).